|

You can have
any or all your email forwarded to an outside email account or to
a different email address within your domain. Here you can learn
how to:

Creating
a Forward
To create a
forward, do the following:
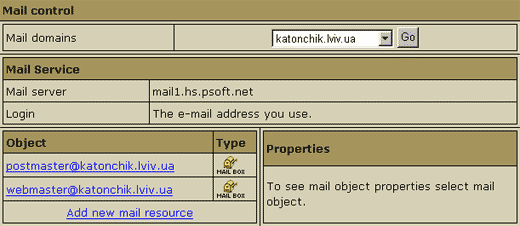
- Select Mail
Info in the Mail Info menu.
- At the bottom
of the page that appears, click Add new mail resource:
- Choose Mail
forward from the drop-down list and click Next:

- Agree with
the charges, if any.
- On the page
that appears, create the forwarding rule:
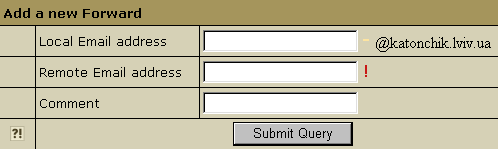
- Local
e-mail address: the address your mail will be forwarded
from.
- Remote
e-mail address: the address your mail will be forwarded
to. In case it is your local address, you must write it in
full.
Configuring
a Forward
To configure
a forward, do the following:
- Click the
forward. This will open its properties on the right:
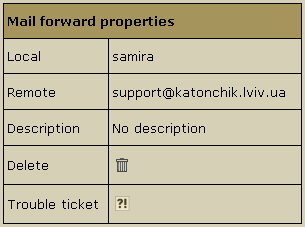
- Configure
forward properties:
- Local:
the local address your mail is forwarded from.
- Remote:
any local or external address your mail is forwarded to.
- Catch
All: if it's on, any email sent to a nonexistent account
on your domain will be forwarded to the remote address(es).
Example: you have a forward from [email protected]
pointing to [email protected]. If you mark this forward
as catch all, incoming mail will be forwarded to [email protected].
If someone sends an email to [email protected], which doesn't
exist, this particular message will still arrive at [email protected].
If this forward wasn't marked as catch all, this message
would bounce back to the sender with an error notification.
- Delete:
click the wastebasket icon to delete the forwarding rule.
- Trouble
Ticket: send your technical administrator a Trouble Ticket
to get assistance with the forwarding rule.
Note: You can have a mailbox named, say, [email protected]
and then create a forward with exactly the same name, i.e.
[email protected]. However, in H-Sphere no mail sent
to [email protected] is stored in it. A forward works
only as a foward.
Forwarding
to Multiple Addresses
To add one more
destination address to a forward, do the following:
- Click the
forward. This will open its properties on the right.
- Click the
Edit icon in the Remote field.
- Enter a new
destination address.
|